| Skip Navigation Links | |
| Exit Print View | |

|
Booting and Shutting Down Oracle Solaris 11.1 Systems Oracle Solaris 11.1 Information Library |
| Skip Navigation Links | |
| Exit Print View | |

|
Booting and Shutting Down Oracle Solaris 11.1 Systems Oracle Solaris 11.1 Information Library |
1. Booting and Shutting Down a System (Overview)
2. x86: Administering the GRand Unified Bootloader (Tasks)
x86: Description of the GRUB 2 Configuration
x86: GRUB 2 Partition and Device Naming Scheme
x86: GRUB 2 and GRUB Legacy Task Comparison
x86: Upgrading Your GRUB Legacy System to a Release That Supports GRUB 2
x86: How to Upgrade Your GRUB Legacy System to a Release That Supports GRUB 2
x86: How GRUB Legacy Menu Entries Are Migrated to GRUB 2
x86: Maintaining GRUB 2 and GRUB Legacy Boot Environments on the Same System
x86: Administering the GRUB Configuration by Using the bootadm Command
x86: How to List GRUB Menu Entries
x86: How to Manually Regenerate the GRUB Menu
x86: How to Maintain the GRUB Menu
x86: How to Set Attributes for a Specified Boot Entry in the GRUB Menu
x86: How to Add a Boot Entry to the GRUB Menu
x86: How to Remove a Boot Entry From the GRUB Menu
x86: Adding Kernel Arguments by Editing the GRUB Menu at Boot Time
x86: Adding -B prop=val Kernel Arguments at Boot Time by Editing the GRUB Menu
Redirecting the Oracle Solaris Console at Boot Time
x86: Customizing the GRUB Configuration
x86: Advanced GRUB Administration and Troubleshooting
x86: Installing GRUB 2 by Using the bootadm install-bootloader Command
x86: How to Install the Boot Loader
x86: How to Install the Boot Loader After Restoring a Root Pool
x86: How to Install GRUB in a Location Other Than the Default Location
x86: Installing GRUB Legacy on a System That Has GRUB 2 Installed
x86: How to Install GRUB Legacy on a System That Has GRUB 2 Installed
3. Shutting Down a System (Tasks)
5. Booting a System From the Network (Tasks)
The following information is provided in this section:
x86: How to Upgrade Your GRUB Legacy System to a Release That Supports GRUB 2
x86: Maintaining GRUB 2 and GRUB Legacy Boot Environments on the Same System
For fresh installations of an Oracle Solaris release that supports GRUB 2 as the default boot loader, nothing is required before performing the installation.
For upgrades to at least Oracle Solaris 11.1, you must install some prerequisite packages prior to the upgrade. These packages are included in the Oracle Solaris package repositories.
Before You Begin
Before upgrading your system to a release that supports GRUB 2, do the following:
Check for any known issues that might impact the installation or upgrade. See Oracle Solaris 11.1 Release Notes.
Review the information and guidelines in x86: How GRUB Legacy Menu Entries Are Migrated to GRUB 2 and x86: Maintaining GRUB 2 and GRUB Legacy Boot Environments on the Same System.
Preserve your existing GRUB Legacy configuration.
$ pkg update
$ pkg update pkg
Running this command updates any packages with names that match *pkg, which is the package that contains the pkg command and its dependencies.
$ pkg update --accept
Note - You must indicate that you agree to and accept the terms of the licenses of the packages that are listed by specifying the --accept option.
The final update installs GRUB 2 as the default system boot loader. The update also creates a grub.cfg file that is based on the contents of the GRUB Legacy menu.lst file.
After the new boot environment is activated, the GRUB Legacy configuration is then migrated to GRUB 2, and GRUB 2 becomes the system's default boot loader. Oracle Solaris boot entries from the menu.lst file are copied to the grub.cfg file in the order in which they appear. Any chainloader entries are also migrated.


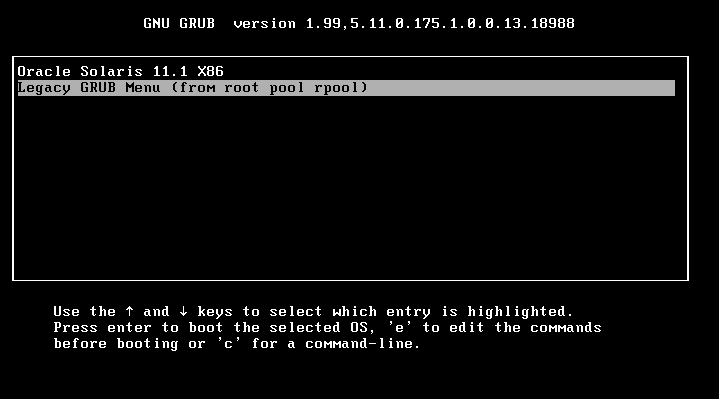
After upgrading to a version of Oracle Solaris that supports GRUB 2, all of the Oracle Solaris menu entries are automatically migrated from the GRUB Legacy menu.lst file to the new grub.cfg file. Any chainloader entries are also migrated. When the system reboots, only those boot entries that were migrated are displayed in the main GRUB menu. Any other boot entries that you want displayed in the main GRUB menu must be manually converted and added to the custom.cfg file. See x86: Customizing the GRUB Configuration.
Note - All of the boot entries from the menu.lst file are present in the GRUB Legacy submenu for that root pool.
It is also important to note that GRUB 2 can directly boot all supported releases of Oracle Solaris 11, as well as Oracle Solaris 10 releases, starting with the Solaris 10 1/06 release. Previous Oracle Solaris releases can be booted indirectly by using the chainloading mechanism. You can add menu entries that use chainloading to the custom.cfg file in the same way that other custom entries are added.
Although the principle of chainloading is the same for GRUB 2 as it is for GRUB Legacy, the syntax is slightly different. In the following example, the entry is chainloaded to the master boot record (MBR) on disk 0. This type of chainloading is useful only if GRUB 2 is not installed in that location. Note also that chainloading this way only works on systems with BIOS firmware (which includes all Oracle Solaris 10 systems).
menuentry "Boot from Hard Disk" {
               set root=(hd0)
               chainloader --force +1
       }
In the following example, Oracle Solaris 10 is installed in the second DOS partition. In addition, the Oracle Solaris 10 version of GRUB Legacy is installed into the partition boot record (PBR) of that partition.
menuentry "Solaris 10" {
               set root=(hd0,msdos2)
               chainloader --force +1
       }
In this example, the entry is chainloaded to the Oracle Solaris 10 GRUB Legacy menu. The result is that there a two levels of menus: one to chainload from GRUB 2 to the Oracle Solaris 10 GRUB Legacy menu, and one to boot the Oracle Solaris 10 kernel from the Oracle Solaris 10 GRUB Legacy menu. To boot the system, you must select the appropriate Oracle Solaris 10 menu entry.
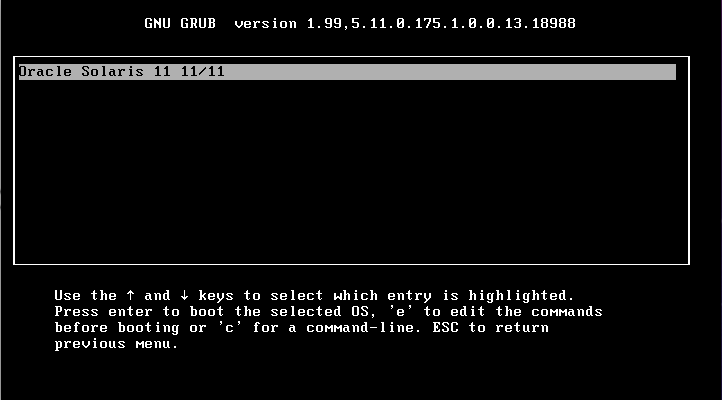
In addition to the Oracle Solaris menu entries that were converted from the menu.lst file, there is one submenu for each root pool that contains a GRUB Legacy menu.lst file. This submenu includes all of the menu entries in the respective menu.lst file and provides access to all menu.lst entries for maximum backward compatibility.
When booting back to an Oracle Solaris boot environment that does not contain the prerequisite packages for GRUB 2, changes to the boot configuration, for example, those that are made by using the beadm and bootadm commands, are only made to the menu.lst file for the appropriate root pool. If you then reboot the system, the GRUB 2 menu does not reflect those changes. Only the Legacy GRUB submenu for the appropriate root pool reflects the changes.
Additionally, these changes do not show up in the main GRUB menu until a GRUB 2 aware boot environment is booted, and the grub.cfg file is regenerated. Wherever possible, when a system runs a boot environment that uses GRUB 2, the menu.lst file is synchronized with the grub.cfg file. This synchronization occurs whenever the beadm or bootadm command is used to make changes to the GRUB 2 configuration.
You can activate GRUB 2 boot environments on a system that has GRUB Legacy boot environments, but only if the GRUB Legacy boot environments are GRUB 2 aware. Also, you can activate a GRUB Legacy boot environment from a GRUB 2 boot environment. One caveat for activating GRUB 2 boot environments on systems with GRUB Legacy boot environments is that you must install the GRUB 2 prerequisite packages in the current boot environment before you invoke the pkg update command to install an Oracle Solaris release that supports GRUB 2. See x86: How to Upgrade Your GRUB Legacy System to a Release That Supports GRUB 2.
Boot environments are managed through the beadm command. See beadm(1M). When the beadm create command is used to create a new boot environment, a menu entry is also automatically created for that boot environment. You can display all of the boot environments that are on a system by using the beadm list command:
$ beadm list
BE                      Active Mountpoint Space Policy Created
--                      ------ ---------- ----- ------ -------
oracle-solaris11-backup -      -          64.0K static 2012-03-29 11:41
oracle-solaris2         -      -          64.0K static 2012-03-29 11:41
solaris11u1                NR     /          3.35G static 2012-02-17 13:22
The beadm command works with both GRUB 2 and GRUB Legacy configurations. When GRUB 2 boot environments are present in list of boot environments, GRUB 2 is retained as the default boot loader. Oracle Solaris does not attempt to reinstall GRUB Legacy as the default boot loader, even if a GRUB Legacy boot environment is activated. If you remove the last GRUB 2 boot environment from the system, you must manually install GRUB Legacy as the system boot loader. If the system includes the GRUB 2 prerequisite packages, you can use the bootadm install-bootloader -f command to manually install the boot loader. See x86: Installing GRUB 2 by Using the bootadm install-bootloader Command. Otherwise, you can use the installgrub command. See installgrub(1M).
Manually reinstalling GRUB Legacy as the default boot loader by using the bootadm install-bootloader -f command forcibly installs GRUB Legacy as the system boot loader. To ensure that all boot environments remain bootable, this command must be run from the boot environment that contains the latest GRUB Legacy boot loader version. In addition, prior to reinstalling GRUB Legacy, all GRUB 2 boot environments should be removed from the system by using the beadm command. See x86: How to Install GRUB Legacy on a System That Has GRUB 2 Installed.
Note - It is important to note that when using the bootadm install-bootloader command with the -f option on a system with an older boot loader, the older boot loader must be capable of reading the ZFS version on the boot disk. Otherwise, GRUB might not be able to read the root pool at boot time, rendering the system non-bootable.
If this situation occurs, you must install a newer boot loader by booting from another boot environment or by booting from recovery media and installing the boot loader version that matches your pool version. See x86: How to Boot From Media to Resolve a Problem With the GRUB Configuration That Prevents the System From Booting.